( see the images to understand better )
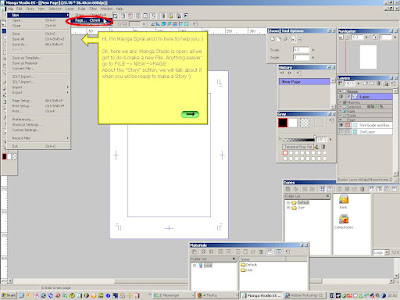
Hi, I'm Manga Sprai and I'm here to help you :)
Ok, here we are, Manga Studio is open, all we got to do is make a new File. Anything easyer : go to FILE --> NEW -->PAGE.
About the "Story" button, we will talk about it when you will be ready to make a Story :)
+--->
 +--->
+--->
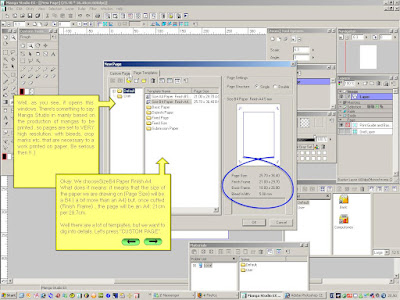
Well, as you see, it opens this windows. There's something to say: Manga Studio in mainly based on the production of mangas to be printed , so pages are set to VERY high resolution, with bleeds, crop marks etc, that are necessary to a work printed on paper. Be serious then !! :)
+--->
Okay. We choose SizeB4 Paper Finish A4.
What does it means: it means that the size of the paper we are drawing on (Page Size) will be a B4 ( a bit more than an A4) but, once cutted (Finish Frame) , the page will be an A4: 21cm per 29,7cm.
Well there are a lot of templates, but we want to dig into details. Let's press "CUSTOM PAGE".
 +--->
+--->
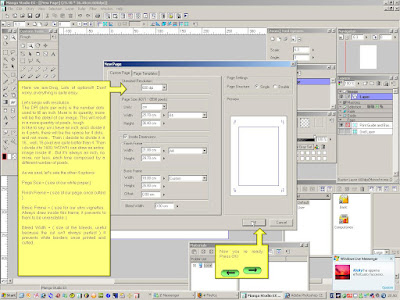
Here we are.Omg, Lots of options!!! Dont' worry, everything is quite easy.
Let's begin with resolution.
The DPI (dots per inch) is the number dots used to fill an inch. More is its quantity, more will be the detail of our image. This will result in a more quantity of pixels , tough.
Is like to say: um i have an inch, and i divide it in 4 parts, there will be the space for 4 dots, and not more... Then i decide to divide it in 16... well, 16 pixel are quite better than 4. Then i divide it to 1600: WOW!! i can draw an entire image inside it! . But it's always an inch, no more, nor less, each time composed by a different number of pixels.
As we said, let's see the other 4 options:
Page Size = ( size of our white paper.)
Finish Frame = ( size of our page, once cutted )
Basic Frame = ( size for our uhm vignettes. Always draw inside this frame, it prevents to them to be unreadable. )
Bleed Width = ( size of the bleeds, useful because the cut isn't always perfect ) It prevents white borders once printed and cutted.
+--->
Now you re ready. Press OK!

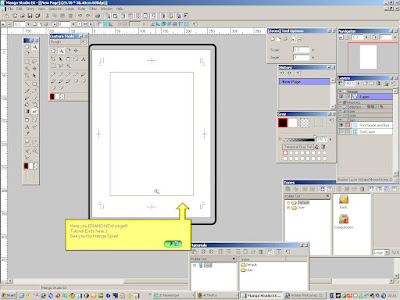
Here your BRAND NEW page!!!
Tutorial Ends here ;)
See you! by Manga Sprai!

Hi, I'm Manga Sprai and I'm here to help you :)
Ok, here we are, Manga Studio is open, all we got to do is make a new File. Anything easyer : go to FILE --> NEW -->PAGE.
About the "Story" button, we will talk about it when you will be ready to make a Story :)
+--->
 +--->
+--->Well, as you see, it opens this windows. There's something to say: Manga Studio in mainly based on the production of mangas to be printed , so pages are set to VERY high resolution, with bleeds, crop marks etc, that are necessary to a work printed on paper. Be serious then !! :)
+--->
Okay. We choose SizeB4 Paper Finish A4.
What does it means: it means that the size of the paper we are drawing on (Page Size) will be a B4 ( a bit more than an A4) but, once cutted (Finish Frame) , the page will be an A4: 21cm per 29,7cm.
Well there are a lot of templates, but we want to dig into details. Let's press "CUSTOM PAGE".
 +--->
+--->Here we are.Omg, Lots of options!!! Dont' worry, everything is quite easy.
Let's begin with resolution.
The DPI (dots per inch) is the number dots used to fill an inch. More is its quantity, more will be the detail of our image. This will result in a more quantity of pixels , tough.
Is like to say: um i have an inch, and i divide it in 4 parts, there will be the space for 4 dots, and not more... Then i decide to divide it in 16... well, 16 pixel are quite better than 4. Then i divide it to 1600: WOW!! i can draw an entire image inside it! . But it's always an inch, no more, nor less, each time composed by a different number of pixels.
As we said, let's see the other 4 options:
Page Size = ( size of our white paper.)
Finish Frame = ( size of our page, once cutted )
Basic Frame = ( size for our uhm vignettes. Always draw inside this frame, it prevents to them to be unreadable. )
Bleed Width = ( size of the bleeds, useful because the cut isn't always perfect ) It prevents white borders once printed and cutted.
+--->
Now you re ready. Press OK!

Here your BRAND NEW page!!!
Tutorial Ends here ;)
See you! by Manga Sprai!

Comments
Post a Comment